Leaderboard
Popular Content
Showing content with the highest reputation on 05/27/2017 in all areas
-
Better late than never, eh? I play Jebediah the IPC and, more recently, Tithonus the plasmaman. Glory to Synthetica. Also, hi.3 points
-
I remember a round months ago as the blueshield when the whole station exploded. Someone had planted a ton of toxin bombs all around the station in smugglers satchels and I was cloning the CMO in medbay when suddenly everyone outside the cloning room got vaporized. I finished cloning him, stole a hardsuit off a dead engineer and stuffed him into the medical hardsuit before making my way to escape, which was on fire. Traitor emagged the shuttle and left while I was left with a mentally retarded clone and a lot of salt.2 points
-
To be honest, I was surprised at how readable that was despite not having a single period. I think it requires a certain amount of skill to communicate effectively without periods2 points
-
How to lose friends and infuriate people A guide to combat on Paradise Station "Robusting", "Robustness" or "Being robust" are the colloquial terms for being good at things in Space Station 13, more specifically applied to combat. Combat can take many forms and end with many outcomes; such as death, incapacitation or mutilation to a stint in the Brig or a minor slap on the wrist. This guide will take you from the basics of interacting with other players in a combat situation, to surviving and eventually winning a combat situation. The absolute basics I have defined Combat as to engage in a fight with; or to oppose in battle. It is almost impossible to play Space Station 13 without engaging in combat of some shape or form eventually, combat is not every player's cup of tea and rightly so, however it pays dividends to know how to approach (or not) a combat situation when it happens. Firstly and foremost I must outline the number one rule for engaging in combat; "This is a game, I can die." Remember that we all play this game for enjoyment, if you approach combat with the sole intention of winning above all else then you will not enjoy the experience. Combat in this game has far too many elements to consider and you will need a level head to be good at it; try to approach combat with a calm attitude and don't rage if you lose. There will always be someone better, luckier or better prepared than you are. Remember we all play this game to have fun and it's not all about winning, so try to take each loss with good grace and sportsmanship and use it as an opportunity to learn and develop yourself as a player. Maybe even congratulate another player after the round is done if they did something great? ------ Now, this guide is about winning after all - so now that is over with, lets get on with it. For all of the below, I highly recommend playing in Hotkey Mode. Hotkey Mode allows you to use WASD for movement as well as access key shortcuts detailed below to save you time in twitch situations, all hotkeys will be highlighted in purple going forward. Important Hotkeys and shortcuts to know are as follows Z - Use item in current hand X - Swap hands R - Throw Q - Drop Shift Click - Examine Control Click - Drag Intents Learning to switch between intents quickly and as needed, as well as how the intents change how you interact with the world is one of the most fundamental parts of combat. Knowing which intent to use and when could be the difference between success and failure. In Hotkey Mode you can use the number keys at the top of your keyboard to change intent corresponding to the below numbers Help (1) - Help intent might not seem too important for combat, however help intent allows you to pass through other players who are also in help intent which is very useful, whereas all other intents will make you unable to be passed through yourself. Disarm (2) - Disarm intent is useful if you are unarmed yourself, using disarm intent on someone has a chance of disarming the item they are holding to the tile below them, or pushing them over which results in a short stun of around 1 second, however as this is RNG based you should not rely on it. Grab (3) - Grab intent when used on someone with an empty hand will apply a passive grab, you then have the option to reinforce the grab by clicking your hand or pressing the Z hotkey which will change the grab to an aggressive grab. An aggressive grab allows you to table someone by clicking an adjacent table, which will stun them momentarily. You can also throw people by using the throw button or the R hotkey. Once in an aggressive grab you can again reinforce the grab to aggressive grab (neck). You can reinforce this grab yet again to begin strangling the person, effectively incapacitating them and making them unable to resist or take an action. Be aware that someone is able to resist out of this action at all stages except for the last. There is a cooldown between each reinforcement stage. Harm (4) - Harm intent will allow you to attack aggressively with your fists or an item. Harm intent is not as important as you may think as most weapons default action is to attack when you click on a person, this is best used situationally and dependant on the item you are using at the time. For example, using harm intent with a ranged weapon on an adjacent person will cause you to hit them with the weapon instead of firing it. Movement and positioning The way that you move is fundamental to all combat encounters, the combat system in Paradise stun-based and being stunned unexpectedly by a taser or baton can and will end you if you do not have an anti-stun. Therefore it is paramount that you stay out of the reach of stuns as much as possible. Do not take your opponent(s) for granted and assume that unless they are incapacitated they can and will be a threat to you. If you are able, you should be moving all the time whilst you are fighting, remember that if you move faster than your opponent can click on your sprite then they cannot attack you. Avoid moving in straight lines or in predictable patterns and use the environment to aid you, corners and choke points can help to funnel enemies if you are outnumbered, open spaces are helpful for dodging ranged weapons. If you are in a bad place or being overwhelmed by numbers - move somewhere else if you can! Better still, learn and prepare your environment before fighting. Don't fight fair and always have an escape route such as a hidden door or a window. Having good knowledge of your opponents potential weapons or abilities will greatly aid you with knowing exactly where to position your character in relation to theirs. Preparation "If you fail to prepare you are preparing to fail." If you do not prepare adequately for a combat encounter then you have a much greater chance of coming off worse from it. Having a weapon, chemical or ability available to use can ensure that your enemy's body is floating in space at the end of the shift and not yours. Knowing exactly who you are fighting against and what they bring to the table will also increase your chances of coming out on top significantly. If you are playing as an antagonist then find a security headset and keep tabs on security communications, if you are security then communicate with your team. If you are able to identify threats before they come down on you then you can prepare that much better. Useful items to keep on your person are as follows; Melee stun - A melee stun such as a stun baton, telescopic baton or stun prod. Abilities such as the Vampire's glare can also fulfil this role. Security officers and Heads of Departments carry these. Ranged stun - Ideally give preference to a hard stun such as a taser or a weapon with a taser mode. Disablers are strong at range however require around 5 shots to incapacitate someone fully whereas a taser requires one albeit at closer range. A lot of these weapons have different modes which can be toggled with the Z hotkey. Security officers usually carry these, however you can find them in the Secure Armoury or you can print weapons from the protolaithe in Research and Development. Slip item - Useful to have to slip people chasing you. A slip is almost as good as a taser and gives more than enough time to apply handcuffs, however these must be used with caution as you can easily fall on your own sword. Empty a spray bottle and refill it with water to create an easy reusable slip. (10 units of water required) Handcuffs - Handcuffs, cable cuffs or zipties. Once you have stunned someone it is wise to cuff them to ensure they cannot easily continue fighting once they recover. This is especially important when fighting multiple opponents as it is almost guaranteed you will run out of stuns before you win the fight. You can make cable cuffs with 15 cables. Flash - Use on cyborgs to apply a stun, almost necessarily if playing antagonist on a cyborg heavy shift. Most security officers carry one. Toolbelt with all tools - Tools are almost always necessary and can be printed from an Autolaithe. Toolbelts can be found in maintenance and are usually carried by engineers. Backpack or Satchel - With space, once you disarm or stun someone then take their weapon immediately, if their weapon is in your backpack then they cannot use it against you should they recover and you have the opportunity to use it for your advantage. Medical Kit - If you get hurt it's wise to keep a few patches or medical items around to heal up fast, remember that damage can slows you down significantly. Actually fighting So you're kitted out with your gear and ready to robust whoever comes your way, but how do you actually use it effectively? Effective combat follows three basic steps as of the current meta. Disable - Either with a stun of some form or with heavy damage, we want our opponent on the floor and helpless so they cannot inflict damage on us and we can move on. Secure - Highly situational, securing your opponent can range from simply applying handcuffs to stripping them depending on what you are trying to achieve. Handcuffing your opponent renders them unable to pick up items or move if you are pulling them; always handcuff first if possible. Removing the headset means that they cannot call for help easily, removing shoes will slow them down, removing their jumpsuit will mean they have no suit sensors. Ideally at this stage you want to ensure that your opponent has no means of retaliating against you. If you intend only to kill and have significant stopping power then you can skip this step completely. Finish - Congratulations you now have someone at your mercy, it's up to you to decide how to proceed, if you are fighting multiple opponents you may have to simply leave one person handcuffed while you repeat this process with the others. Remember you do not have to kill everyone at this stage. Simply leaving the person bucklecuffed to a chair naked while you make off with their equipment may be victory enough. Remember they are a player too. Sounds pretty easy doesn't it? In the next stage we will expand on these steps and discuss the most effective ways to achieve them.1 point
-
1 point
-
1 point
-
I never brought this up because I have a make skrell that is gay cough cough cough But yes, I find just little things added to different races could help them be a little more different.1 point
-
Well, I wasent demanding it be made perfectly... but if you only make enough for one and a quarter pills... that's hardly useful is it not? As for it being non-critical. If someone becomes irradiated, they start taking tox, and also dealing tox to everyone around them. If said person is not fixed they will eventually die. And because the effect is genetic they will be cloned with it and die again thereafter. It doesn't get as many mhelps because the wiki tells you step-by-step how to make it. The chem wiki just tells you what to mix. I reference my earlier part to do with a pill and a quarter here. Not in all cases, see being irradiated. If you leave someone stammering, unable to move and with horns. Your not gonna make any friends with the IAA's. Things can't wait in medical, unless you want to risk being overwhelmed by patients and being fired for malpractice.1 point
-
1 point
-
1 point
-
I had a rather unusual situation today as the captain. Syndicate agent was caught bombing people and wanted to die. Her boyfriend pleads with me to reduce it from execution so I cut him a deal. Give me /something/ and I'll drop it to permabrig. He comes back with.. very little. But, I liked the CE and he does damned good work, so in exchange for saving her, he puts his department into overdrive and it was greatly needed at the time. Then she tried to commit suicide. Now I have a chief engineer working his tail off in exchange for keeping his GF alive, who is now in a sleeper with enough ether to keep her out. Then a shitcurity officer declares on security channel he's going to execute her and not only did I jump his case, the magistrate did as well. I'll say it was an interesting shift.1 point
-
.... what? BREATH MAN! BREATH! You don't have to spit all that out as one long run on sentence you know...1 point
-
*kazoo version of Rocky training montage playing in the distance*1 point
-
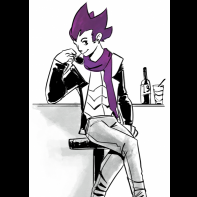
[SPACE SAVED FOR ADDITIONAL CASE DETAILS] Photo Records: Lauge-Haliber (Commissioned from the ever-delightful FieH) (Provided by the lovely Pawneax) Marsilona (Commissioned from the fantastic FieH) Known Associates: Note, these are not to be sought for questioning. These names are simply listed for reference in accordance to their relation with the listed suspects Alice Church > Tony Marsilona; Colleagues before NT employment. Former Lovers?? Valthorne Haliber > Mercy Lauge-Haliber; Spouse1 point
-
1 point


