TGMC:Guide to vehicles

|
This page is a part of the TGMC wiki.
TGMC is a project based on the CM-SS13 codebase. |
Welcome to using mobile machineries in TGMC! This guide will get you familiar with how to use each vehicles and ensure that you can beat the xenomorphs back to their hives!
You may be daunted by the unfamilar gadgets in front of you, but that's okay; everyone has to start somewhere.
What is important is knowing the responsibility of each vehicles. Not knowing what you need will have marines yell at you for being incompetent.
The Hangar
The Hangar is where marines, and you!, go to be transported from shipside to planetside. It has two dropships, a dedicated CAS plane, and a mini-hangar for droppods.
All hangars have the storage room, two powerloaders and various weapon and upgrade modules for the ships. To the east is also the machine to produce more Ammo and Modules. Spend your points wisely, they take a long time to replenish (1 point every 2 seconds). North of the Alamo is the Ammunition-Storage. This is where the CAS Ammo is stored that is available at roundstart, as well as some other starting modules.
If you want to install a module or reload a weapon, you will need a powerloader, this is how you install a module, it works the same for ammunition:
- Right click the powerloader
 and click “Enter powerloader”
- Alternatively, you can clickdrag your sprite onto the powerloader.
- Move infront of the module and left-click on it, you can carry two modules, simply switch active hand to carry another one.
- Move to the right slot and click left click on it, that’s it, you installed a module.
Alamo
The Alamo is the primary way to deliver marines from shipside to planetside and vice versa. As old as she is, you cannot doubt the reliability of the Alamo; however, you have to contend with lazy POs that don't want to operate her due to how boring cycling Alamo is.
The Alamo has two engine module slots, one interior module slot, two electronic module slots and four weapon module slots.
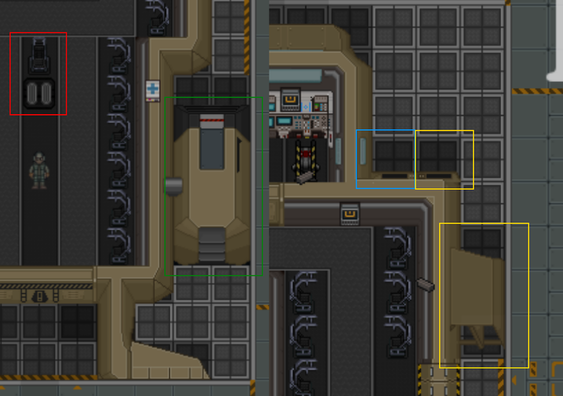
- Rear Slot: This is the place where the
medevac modulesurgery table and the mounted smartgun module goes. Engine Slot: This is where engine modules were installed. Currently unused.- Electronics Slot:This is where electronics are installed, the spotlight and the LZ detector.
- Weapon Slot: This is where the weapons are installed, like the rocket-pod or the sentry-deployment-system.

Alamo's UI
There are two ways to controlling the Alamo, via its cockpit and via remote computers.
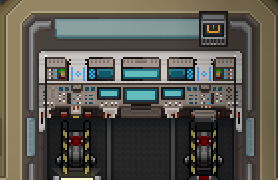
In the cockpit of the Alamo you will find the three main consoles.
- The camera control console (left), which lets you view the different cameras of the dropship.
- The main control console (middle), which lets you fly the dropship.
- The weapon control console (right), which lets you fire your weapons or deploy your sentries.
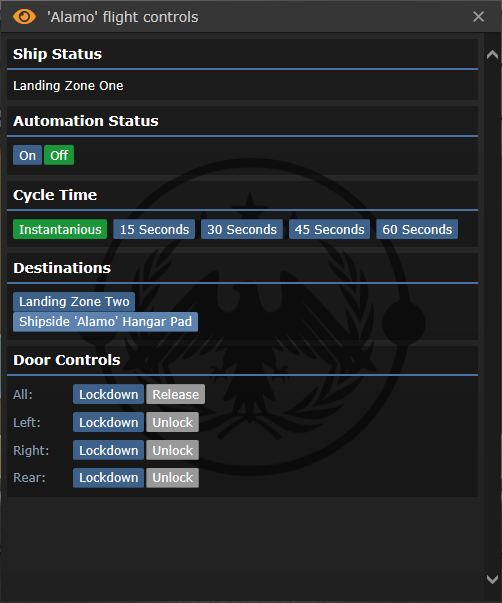
Using the center console allows for more advanced commands than through the remote computers found on the LZs or in CIC. From here, you can not only designate a landing zone, but also toggle automatic cycling mode. Once toggled, the Alamo will automatically cycle between the last two chosen destinations, at an interval of your choosing (after the recharge delay).
You can also toggle the lockdowns on the left, right, and rear doors of the Alamo. Doing so will prevent anyone from opening the door until the lockdown manually deactivated from the cockpit; either by the PO, or an invader. Note that the lockdown will lock the doors into their current state; toggling lockdown while a door is open will force it to remain open.
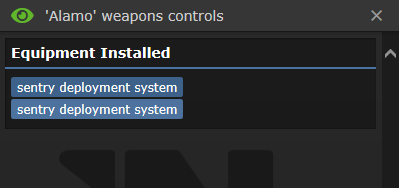
The right part of the cockpit is the computer to deploy sentries to protect the Alamo from xenomorphs. This UI can also be used for fire mission if the Alamo is equipped with CAS arsenal, but it is recommended to use CAS for the Condor jet.
Alamo's Responsibility
Communication is key with the Alamo. One of the primary mistakes when using the Alamo is not knowing when and where marines want to be at.
- Before the Alamo launch into one of the landing zones in planetside for marines' first deployment, ask what landing zone the forward operational base, or FOB, is in.
- Always tell marines when you are launching so that the marines heading to the Alamo is more motivated to haul ass.
- Install surgery table in Alamo; It will generally see more use than the machinegun hardpoint, as the back door almost always gets locked in the event of an assault.
Tadpole
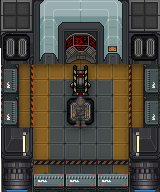
The Tadpole is a compact support vessel, used to quickly and accurately provide aid to marines in any open-air battlefield scenario. The primary differentiating feature of the Tadpole versus the Alamo is landing capability. The Tadpole has the ability to land in any unobstructed, open-air area, drastically increasing the deployment flexibility of any marine force that choses to use it over the Alamo. This comes with the downside of defense, as a the Tadpole can quickly be overrun if caught out of position, as well as the downside of size. Being a small vessel, it can be tricky to load a substantial amount of cargo onboard, and the ship will quickly get cluttered if over capacity.
The controls are accessed through the central console. Transit is performed similarly to the Alamo, with the caveat that the Tadpole doesn't go directly to the ground. After a transit phase, and Tadpole will wait in low atmosphere, designated by the surrounding clouds. From here, using the console will bring up the landing interface. After selecting a landing point and touching down, the Tad can be sent back into low atmosphere to reposition, or sent back to the ship from low atmosphere.

Landing the Tadpole
The Tadpole can land in any unobstructed, open-air position. When using the landing interface, accessible by using the central console in low-orbit, you will see a birds-eye view of the battlefield, and an outline of the Tadpole in the center of the screen. If the entire outline is green, you have a viable landing area; if any tiles are red, they are obstructed, and the Tadpole cannot land in that position. You can rotate the landing outline using the rotate button at the top of your HUD.
Once a landing field has been selected, the outline will turn blue, indicating that the Tadpole will arrive there shortly.
 Fully green landing indicator. You're clear to land.
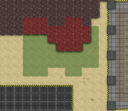 Partially red landing indicator. The landing zone is obstructed.
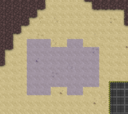 Blue landing indicator. The landing zone has been selected.
Condor
The Condor is the dedicated Close Air Support vessel for the marines. As its operator, you are responsible for laying eternal hellfire from above, albeit with a small delay. Hopefully the majority of your shots hit something other than marines.
Unlike the Tadpole and Alamo, the Condor runs on a limited fuel supply. For the duration the Condor has its engines on, an amount of fuel is expended, preventing unlimited CAS support. You can refuel the ship using jerry cans, which will likely be found near the Condor - unless the motorcycle operators stole them all. Click on the cockpit with a can to refuel the ship. A percentage will show, displaying how much fuel is currently in the ship. Continue refueling until fully topped off. Once a jerry can is empty, refuel it by clicking on a fuel tank.
Note that the cockpit starts closed. Click to open, then click on the cockpit again to enter. The flight UI will automatically display.
Resist to exit the cockpit. Note that you can do this in space. Note that being outside, in space, is not a place you want to be.

Condor's UI
[Get a UI Image] The flight UI is divided into two sections: Ordinance, and Flight Control. To launch, select a viable target from the flight control section, or launch manually to fly with a reduced target visibility range. Prior to taking flight, you'll need to make sure your engines are spooled. This will use fuel, so make sure to launch as soon as possible after the engines have been spooled. When not in use, deactivate the engines.
When in the air, you'll be given a birds-eye view of the battlefield. Your visibility is based on what marine cameras can see, as well as extended visibility from deployed CAS flares and lasers. You can move your view using your standard movement keys.
Note that your cursor has probably turned into a crosshair. While in flight, clicking anywhere in your view will fire your selected weapon at that precise point after a slight delay, if the area is viable. Certain areas, such as those under caves, cannot be fired at by CAS. Certain weapons, like the miniguns and laser, fire over an extended area. You can control the direction of this area from the flight control section, by changing the firemission direction.
To change your weapon, select one of your equipped weapons from the Ordinance section. Doing so will bring up the weapons ammo meter in your flight UI, and toggle it to be fired when you click.
The Condor will automatically return to the ship once out of fuel. You can return manually by selecting the option in the flight control section.
CAS Weapons
The Condor features four primary weapons for close air support (The central minigun on the Condor is just a built-in 30mm cannon, don't tell anyone). Similarly to the Alamo modules discussed above, use a powerloader to equip them onto the relevant attachment points. The Condor features 4 empty attachment points to start, so feel free to mix and match.
Reload weapons using the powerloader. With the relevant ammo held, click the weapon to fill it. If the weapon is still loaded, use an empty claw to remove the old ammo prior to reloading. Some weapons, like the 30mm cannon, require you to remove the old ammo box if it's been fully depleted.
Drop Pods
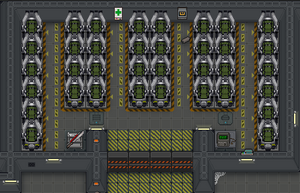
The Drop Pods serve as a rapid one-way deployment system for shipside marines to reach the field. Click with an empty hand to enter a pod, and the UI will automatically open, allowing you to input coordinates, verify your location, launch, or exit the pod. If you close it, you can reopen the menu through the tabs in the top right of your chat window.
Pods can only be launched after the Alamo first reaches the surface. Be sure not to launch before the shutters are down, or you'll likely get swarmed and instantly die.
The console at the entrance of the Drop Pod bay isn't just for show - it can launch all manned drop pods simultaneously, for coordinated strikes.
Drop Pods' UI
Communicate with your team in order to get viable drop pod coordinates. Set them by either manually inputting the X and Y coordinates in the relevant fields, or by dragging the field up and down to increase or decrease the number.
To make sure your selected area is viable to drop to, press the "Check drop point validity" button. It will warn you if the area is roofed, inside terrain, or otherwise inaccessible.
When ready, press the "Launch Droppod" button. Otherwise, you can exit with the "Exit Pod" button.
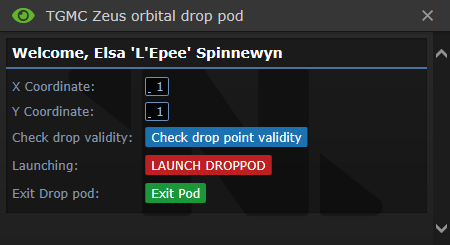
Don't tell anyone, but you can use the Webmap for accurate drop coords.
Motorbike
 The premier in marine transportation technology - besides the Alamo, Tadpole, and every other transport vehicle.
Allows full running-speed movement for one marine, upgradable to two with a sidecar, in exchange for fuel. Contains an internal storage bay for your convenience.
Refueled using a jerry can, most immediately accessible through stealing them from the Condor. Don't steal all of them, or the PO will "accidentally" CAS you at the first opportunity.
Unmanned Vehicles
Sometimes the best choice is not to put yourself on the firing line. Sometimes the AI wants a chance to shoot, too. Sometimes the Captain wants to kill Xenos, and the OB just isn't doing it. In these cases, the Unmanned Vehicle system shines.
UVs come in three chassis variants:
 Light chassis: High speed, 300 health.
 Medium chassis: Intermediate speed, 400 health.
 Heavy chassis: Low speed, 500 health.
These are combined with the cannon, which comes in two variants:
 Light cannon: 20 Damage, 0.5 Sunder
 Heavy cannon: 40 Damage, 5 sunder
These are ordered separately from the Engineering section of requisitions, and must be combined when the crates arrive.
Alternatively, you can order a bipedal combat drone, or a bipedal scout drone. Note that the scout drone does not have any armament, though it does come with a built-in cloaking system. Best used for detpack bombings, if you can spare 40 points per drone.
The assembly can be driven automatically by the AI, or using a vehicle controller (Also orderable from requisitions). Note that AI control and Controller control are mutually exclusive; once one operator has selected the vehicle, it cannot change to the other operation type.
All types of UVs can be repaired using a welding tool. In the event that they survive long enough to run out of ammo, more can be ordered from the Engineering section of requisitions, though it must be installed manually.
TANKKKKKKKKKKKKKKKK
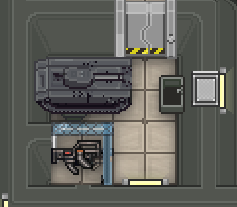
Hey gamers. You're probably wondering where tank is. The problem with tank is that tank is an unbalanced piece of shit that never deserves to see the light of day until it gets rebalanced.


