Difference between revisions of "Telecommunications"
Sirryan2002 (talk | contribs) (no longer WIP) |
Sirryan2002 (talk | contribs) (added NR tag) |
||
| Line 1: | Line 1: | ||
{{Needsrevision|reason=Needs stuff about user filtering}} | |||
== Quick Start Guide: Setting up Telecommunications (Roundstart) == | == Quick Start Guide: Setting up Telecommunications (Roundstart) == | ||
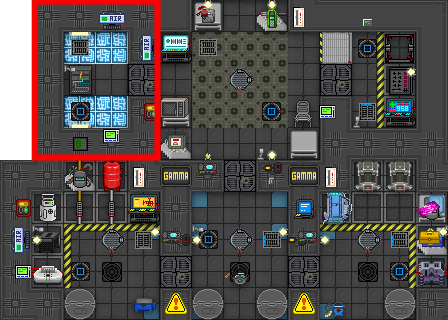
[[File:AI_TCOMMS.png|right|480px|Framed in red is the room containing the Telecommunications Core and the NTNet Relay]] | [[File:AI_TCOMMS.png|right|480px|Framed in red is the room containing the Telecommunications Core and the NTNet Relay]] | ||
Revision as of 17:02, 9 April 2021
Quick Start Guide: Setting up Telecommunications (Roundstart)
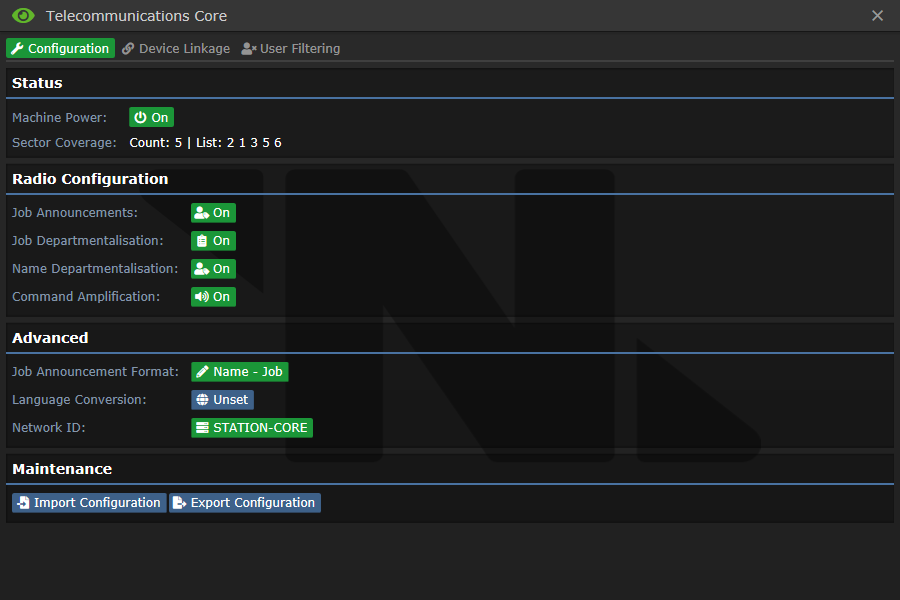
If someone asks you to "Set up tcomms", they likely want you to enable job cards and colouring. This can be achieved by opening the Telecommunications Core, found within the AI satellite (Pictured to the right). When you click on the Core, you will be presented with a user interface. From here you can set whether you want to announce jobs, colour them based on department (Job Departmentalisation), colour names based on department (Name Departmentalisation), and make command members bold (Command Amplification).
If you enable job announcements, make sure you select an announcement format at the bottom of the UI, otherwise job tags will not appear!!
Machine Breakdowns
Modern Telecommunications is made up of two distinct machines. A Core and Relays. Every single machine has a network ID (Can be changed) and a network address (Cannot be changed).
 The Core
The Telecommunications Core is the main machine in charge of telecommunications. It is the machine that does all the signal processing, handles NTTC configurations, as well as serving as a centralized link point for all relays to connect to. While the core is a very important device on the station, you cannot set up multiple or redundant cores within the system. Attempting to power on multiple cores will return an error about radio interference.
The Device Configuration page of the core contains the following (In order):
- Toggle to turn the machine on and off
- List of all sectors (Zlevels) that are reachable by that telecommunications network
- Toggle for job tags
- Toggle for job tag colouring
- Toggle for name colouring
- Toggle for bold command members
- Selection for job tag format
- Selection for language conversion
- Button to change the device network ID
- Buttons to import and export configuration (JSON import/export for NTTC)
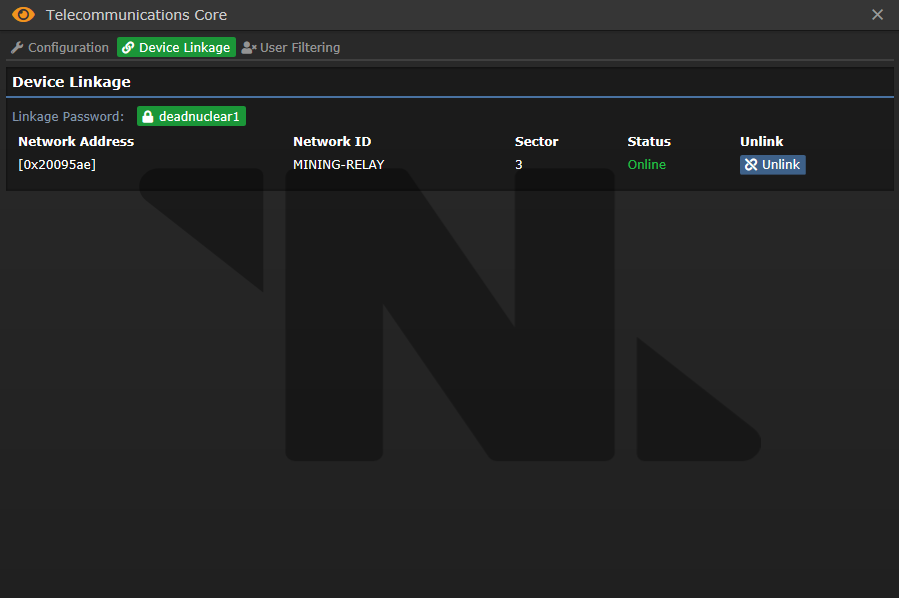
The Device Links page contains a list of all the relays connected to the core, as well as the password for linking more relays. Displayed is each relays network address (Think MAC address), network ID (Think device name), sector (Zlevel), status (Whether the relay is active or offline), and a button to forcibly unlink the relay. Shadow linked relays do not show up in this list.
 Relays
Telecommunications Relays are used as expansion devices to the hub. You can build a relay onto another Zlevel and easily expand telecommunications reach to there. Making multiple relays on one Zlevel does not duplicate messages, which means this can be used as a source of redundancy.
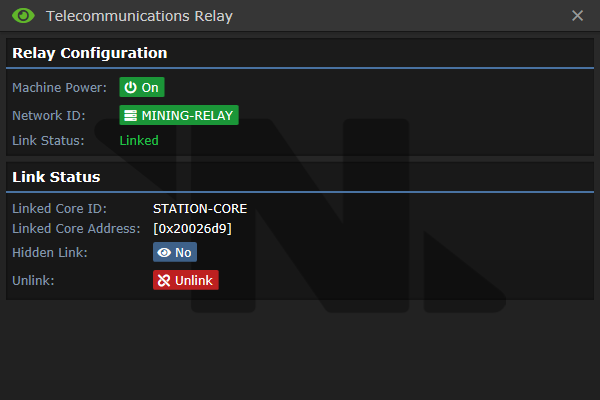
This page will be displayed if the relay is linked. It contains the following entries (In order):
- Toggle to turn the machine on and off
- Button to change the device network ID
- Link status
- Linked core ID
- Linked core address
- Toggle for hidden links
- Button to unlink the relay from the core
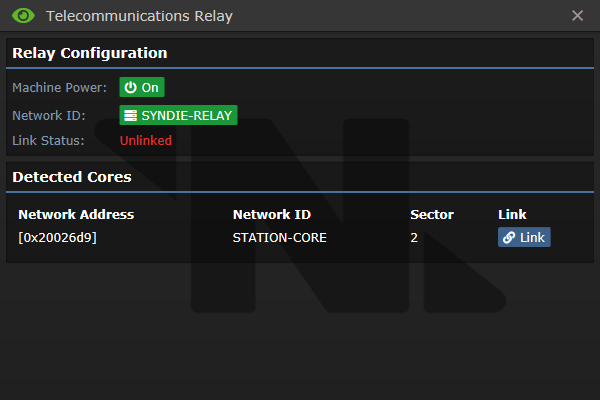
This page will be displayed if the relay is not linked. It contains the following entries (In order):
- Toggle to turn the machine on and off
- Button to change the device network ID
- Link status
- A table of all cores in the world that the relay can be linked to
When pressing the "Link" button, you will be prompted for the password of the core you want to link to (Listed in the core's Device Links page). If this password is entered correctly, the relay will now be linked to the core.

